Getting Started
Thank you for purchasing my theme. If you have any questions that are beyond the scope of this help, please feel free ask any questions on the online Support System. Thanks so much!
Knowledgebase
Search our knowledge base articles including Getting Started, Troubleshooting and FAQ and more.
View KnowledgebaseChangelog
The log of changed files for Edition. Your current version is Edition v1.0 .
View ChangelogInstallation Installing Edition
WordPress is required
To install this theme you must have a working version of WordPress already installed. For information regarding the installation of the WordPress platform, please see the WordPress Codex
Once wordpress is installed, you can upload the theme files and activate the theme. The theme files can be uploaded in two ways:
- FTP Upload
- Using your FTP program, upload the non-zipped theme folder into the /wp-content/ themes/ folder on your server.
- WordPress Upload
-
First, unzip the downloaded zip file. Navigate to Appearance > Add New
Themes > Upload. Go to browse, and select the zipped theme folder, called
edition.zip. Click Install Now and the theme will be uploaded and installed.
Once the theme is uploaded, you need to activate it. Go to Appearance > Themes and activate your chosen theme.
Plugin Install Installing Required Plugins
Required Plugin Installation
The theme's functionality is broken up through the use of individual plugins. This way, when if you ever decide to change themes, your site data, like shortcodes or contact forms will continue to work on your new site.
-
Once you have activated the theme a plugin notification should appear, prompting you to install the required and recommended plugins. Follow the prompt and Click
Begin installing plugins.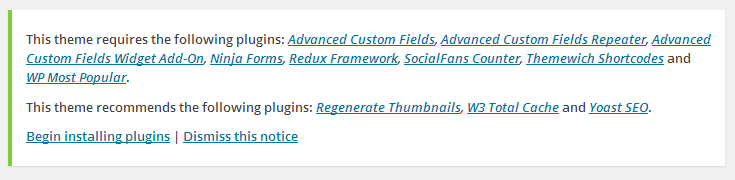
-
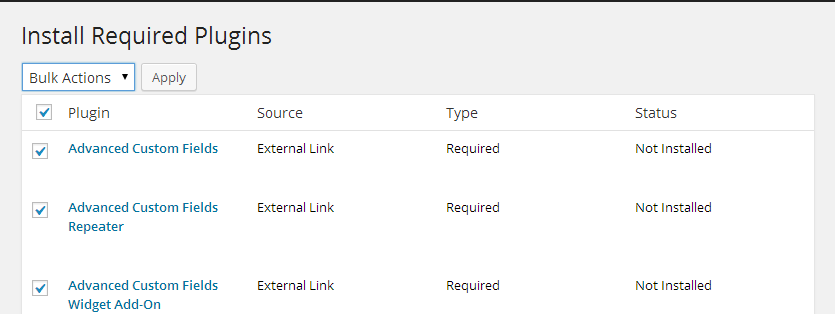
On the following page click the checkbox next to Plugin in the header. This will select all plugins. Only the plugins marked "required" are required for theme functionality. The rest are completely optional.
-
Then click
Installunder theBulk Actionsdropdown and clickApplyto finish the process. The plugins will automatically be activated.
Manual Plugin Install
If you've already installed the required plugins using the above directions, then you don't need to manually install the required plugins. However, if you've run into problems installing the theme's plugins, you can manually install them.
-
Navigate to Plugins > Add New. At the top of the page, below Install Plugins click the
Uploadlink and then selectChoose file. You can find all the plugins in your theme download in thePluginsfolder. Choose a file to install the plugin.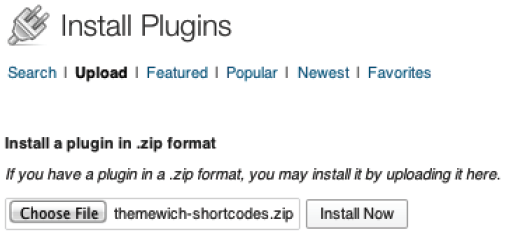
-
Once you selected the correct file, click
Install Now. The plugin will unpack, install, and then require activation. SelectActivate Plugin. Your plugin is now activated.
Page Setup Setting The Theme Pages
After you install your theme, you'll need to set up page templates and a few options to get it running properly.
Setting Up The Homepage
-
To set up the homepage you must create a new page. Navigate to Pages > Add New. You can give this page any title and you do not have to include any content.
-
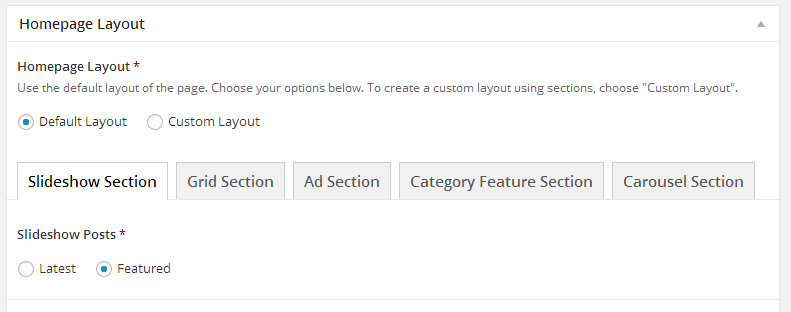
Select the
Homepagetemplate from the Page Attributes section. -
Complete the Homepage Layout Options below the page content area. Be sure to fill out the information on each tab. Once you've filled out all the information for the default homepage, click Publish.
-
Now that you have created your new page which uses a homepage template, navigate to Settings > Reading to configure the Front Page Displays setting.
-
Select the
A static pageradio button and choose the page you just created as yourFront pageand click Save to save the changes.
Your homepage is now created and can be viewed by visiting your root URL.
Setting Up The Blog
-
To set up the blog page you must create a new page. Navigate to Pages > Add New. You can give this page any title and you do not have to include any content.
-
Now that you have created your new page, navigate to Settings > Reading to configure the Front Page Displays setting.
-
Select the
A static pageradio button and choose the page you just created as yourPosts pageand click Save to save the changes.
Your blog page is now created and can be viewed by visiting the page you just published.
Setting Up The Contact Page
-
To set up the contact page you must first be sure the "Ninja Forms" plugin is activated. Navigate to Forms > Import/Export.
-
Click Choose a File and locate the
Content Importfolder in your theme download. SelectEdition-Contact.nffand click Import Form. -
To set up the contact page you must create a new page. Navigate to Pages > Add New. You can give this page any title and you do not have to include any content.
-
Select the
Contact Pagetemplate from the Page Attributes section. This ensures your page will have the Contact Page sidebar. -
On the right side bar under
Append A Ninja FormselectContactfrom the dropdown. Once you’ve selected the form, click Publish or Update to save.
-
Now that you have created your new page which uses a contact form, make sure you have the correct information entered for your form by visiting Forms > All Forms > Contact Form.
Your contact page is now created and can be viewed by visiting the page you just published.
Menu Setup Setting up the Navigation Menu
Once you've added your pages you'll need to setup your main navigation menu which appears at the top of each page.
-
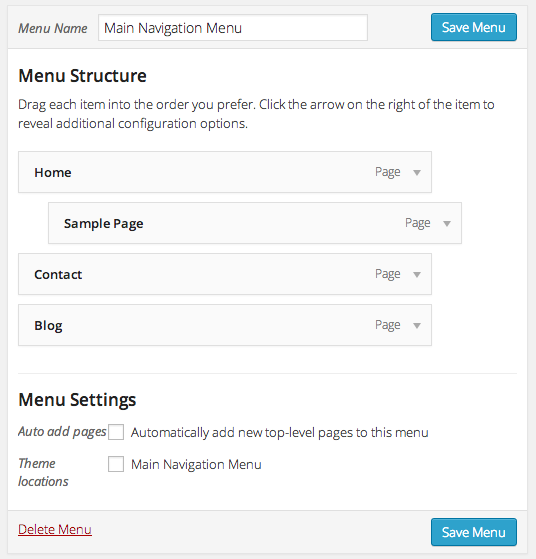
To set up the navigaton menu mavigate to Appearance > Menus and enter the name of your menu in the text box provided. Click Create Menu to begin.

-
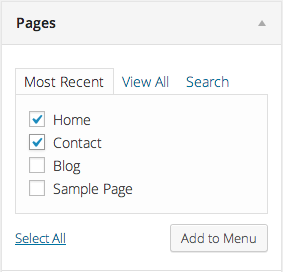
Add items to the menu by selecting from left column options panel. Add pages, link or categories by selecting the checkbox of the item and then clicking, Add to Menu.
-
Once items have been added to a menu, drag and drop to put them in the desired order. Drag a menu item to the right a little to make it a submenu and create a hierarchy.
-
After your menu has been created be sure to set the location. Under Menu Settings, select the checkbox
Main Navigation Menufor Theme Locations. Click Save Menu to save all recent changes made to your menu.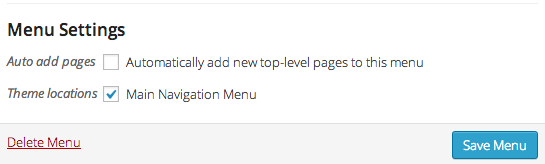
Your main navigation menu now created and can be viewed by visiting any page.
Creating a Mega Menu
For a different style menu, you can create a "Mega Menu" which displays links in vertical columns instead of individual dropdowns.
-
First, be sure you've set up your menu. Navigate to Appearance > Menus to create a mega menu dropdown.
-
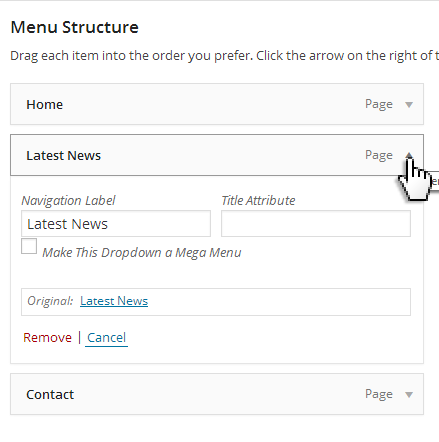
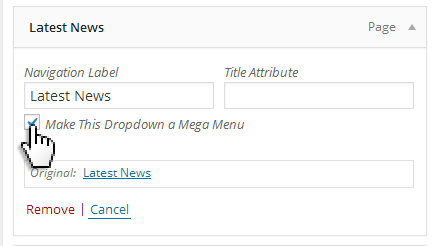
Click arrow on the right hand side of the top-level menu item that you want to hold the dropdown menu. This will be the item that will display the dropdown menu when hovered. This menu item needs to be on the top level.
-
Click Make This Dropdown a Mega Menu on the item. If you don't see this option, then your menu item isn't at the top level.
-
Once you've made this selection, you need to add column headers to your menu. Begin by clicking Links on the left hand side of the screen. Enter
#in the URL box and enter your column title in the Link Text box and click Add To Menu.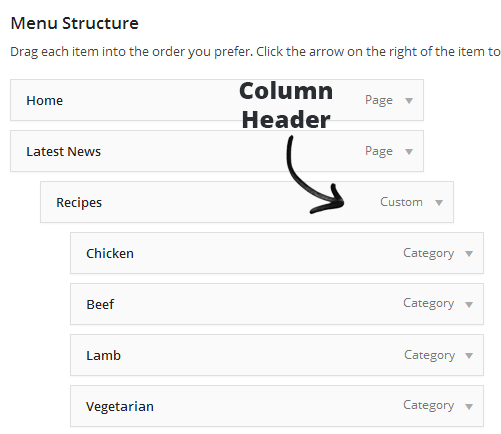
-
Add menu items to your custom header. These items will show up in a column.
-
Add additional # link items to add another column, and additional menu items in each column to create the menu.
It's important to note that you can't have custom links in your megamenu dropdown.